It’s been a while since I’ve updated the BatBerry blog. I’ve been heads down working hard to bring Brainiac to market. I’ve had a few people ask me to upload the remaining 3D models for the Side Mechanics. I haven’t had a chance to test print every piece yet so please provide any feedback if there are parts of the model that still require some adjustment. All of the 3D STL printable files can be downloaded from here.
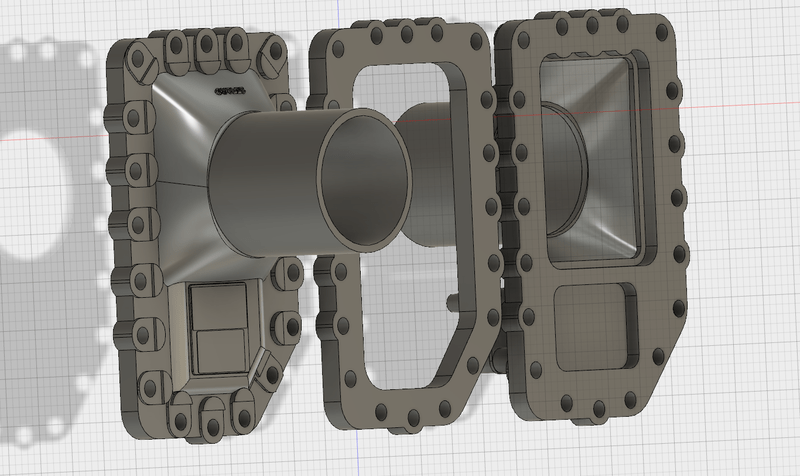
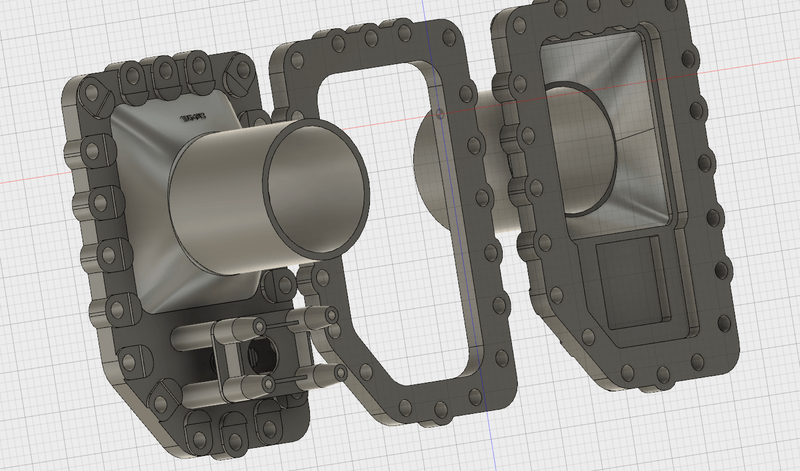
The 3D model files are broken up into different pieces that all fit together like a puzzle or, more accurately, like a set of PVC plumbing fixtures that can be glued together. First is the main Hot Air Valves themselves. They are broken up into three files: hot-air-front.stl, hot-air-middle.stl and hot-air-rear.stl. The same hot air valve is used on both sides of the vehicle. The valve simply points in the opposite direction on either side of the car so there is no need to flip the 3D model itself. The three pieces are held together with a series of bolts that go around the edges of the valve.
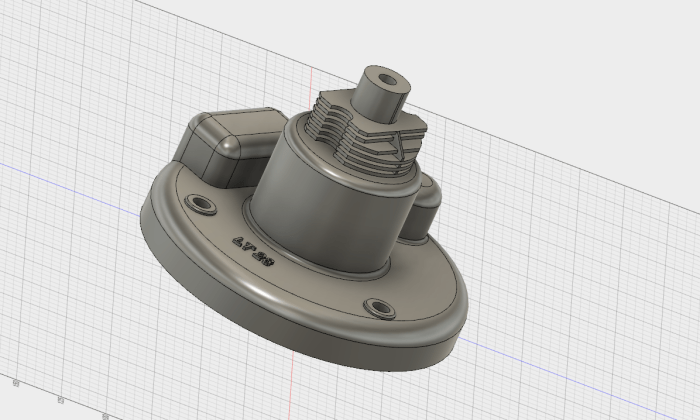
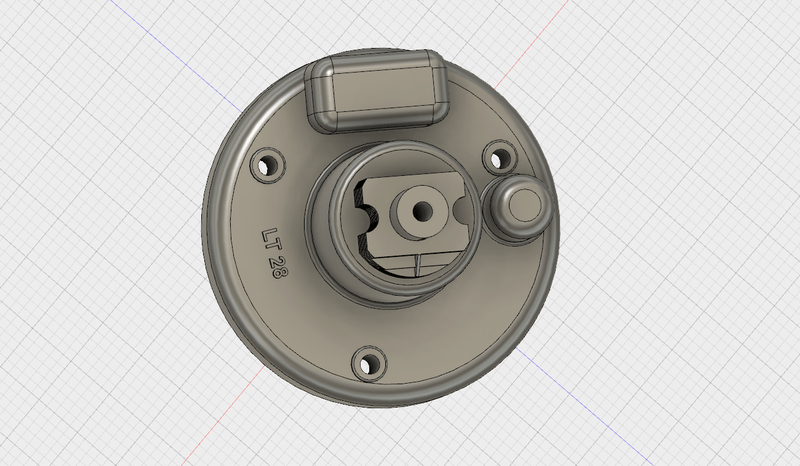
Next is the infamous “donut” which appears at the rear of the side mechanics next to the side intakes of the vehicle. This part consists of a round donut like body and a separate part that looks like some kind of cooling fins which are bolted to the top of the donut. They are broken up into two files: donut.stl and donut-fins.stl.
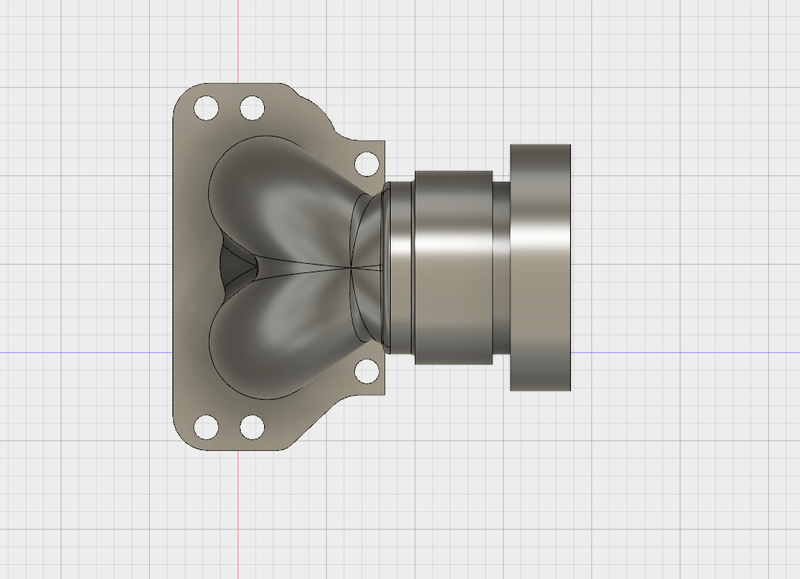
Starting from the front of the car there’s a heart shaped pipe that is bolted to the body and provides the front anchor point for the side mechanic piping. This same piece is used on both sides of the car so the same model can be used and simply 3D printed twice. You are then able to use a length of standard 1.5″ PVC plumbing piping to connect the heart to the “coffee can” which will be outlined later. The file to download for this piece is called: front-heart.stl.

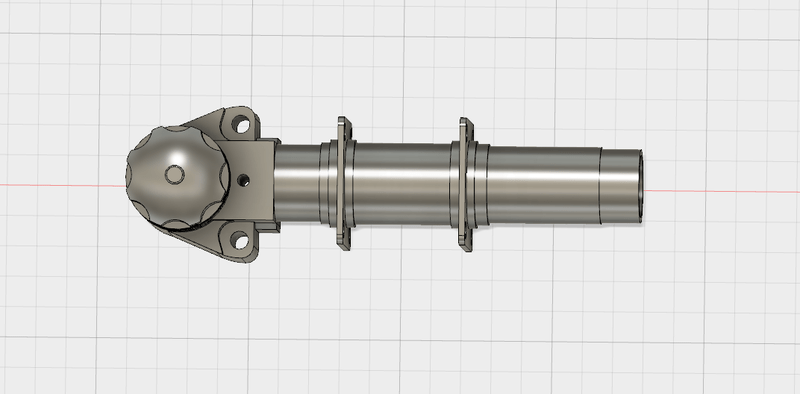
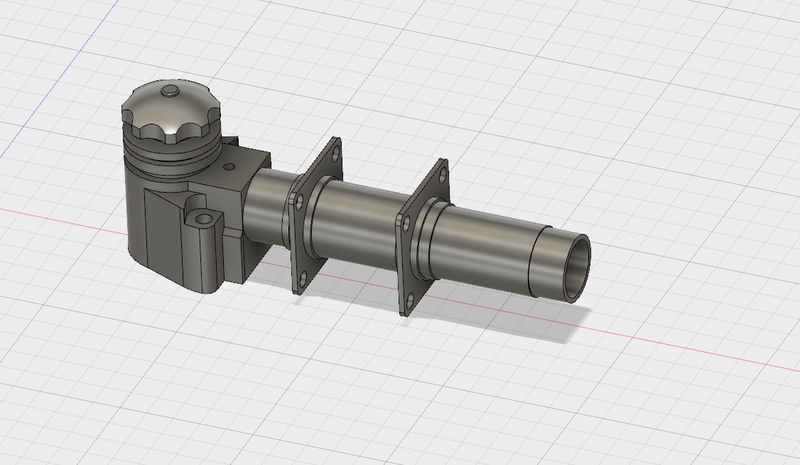
Below this heart shaped piece is a fixture that looks like some kind of faucet. This is yet another part that is entirely for decoration. My guess is that they were looking for different pieces that would create a sense of balance for the pipes on the side of the car. This is one that simply fills up some space.
The part has been designed with some bolt holes for fastening it to the vehicle as well as some holes for the decorative bolts that run parallel with the body of the pipe. I created the end of the pipe with a diameter just under 1″ so that it would be fairly easy to find a fitting to connect/glue/thread hoses to the end of the faucet. This is another model that simply needs to be printed twice and used on both sides of the vehicle. There is one single print file for this part named: faucet.stl.
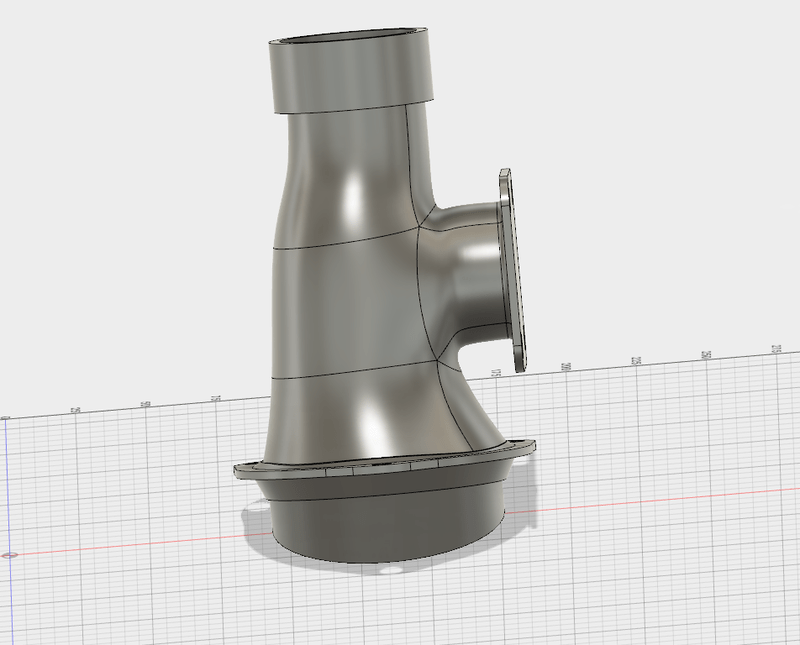
As we continue to move our way back down the side of the vehicle we come to the “coffee can”. This is another strangely shaped piece of piping that has three connection points. One using the 1.5″ PVC piping going down to the front heart, one connecting to the side of the vehicle and one that connects up to the Hot Air Valves. To print the coffee can there are two files. They are essentially identical, other than one is the mirror of the other to provide the proper angles on both sides of the car. The two files for this part are named: driver-coffee.stl and passenger-coffee.stl.

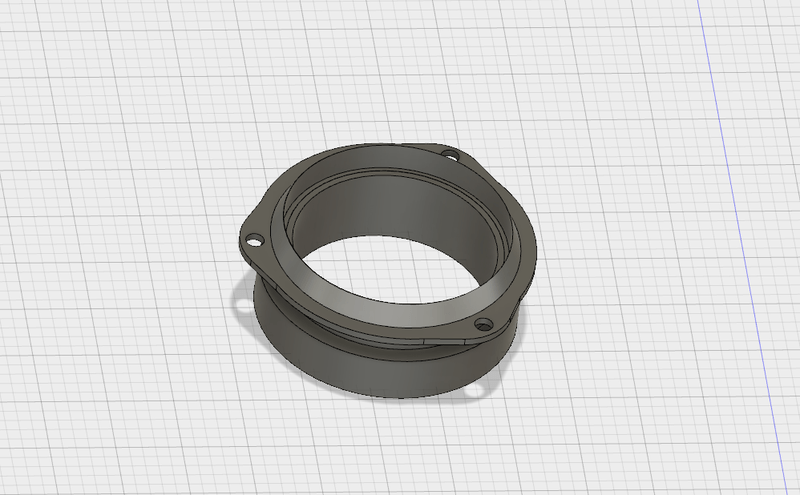
Heading towards the back of the vehicle the next part is the front ring. The coffee can slides into this front ring allowing you to glue the two pieces together. This ring is also the piece that joins the coffee can to the hot air valves. You may need to trim the front tube on the hot air valves for length depending on how close you want the coffee can to be to the valves.
This same ring is used on both sides and can simply be printed twice. To get the look of the V-band clamp from the actual side mechanics, I use a T-clamp that simply slides over this ring for decoration creating the same look without the added expense. The file to print for this section is named: front-ring.stl.
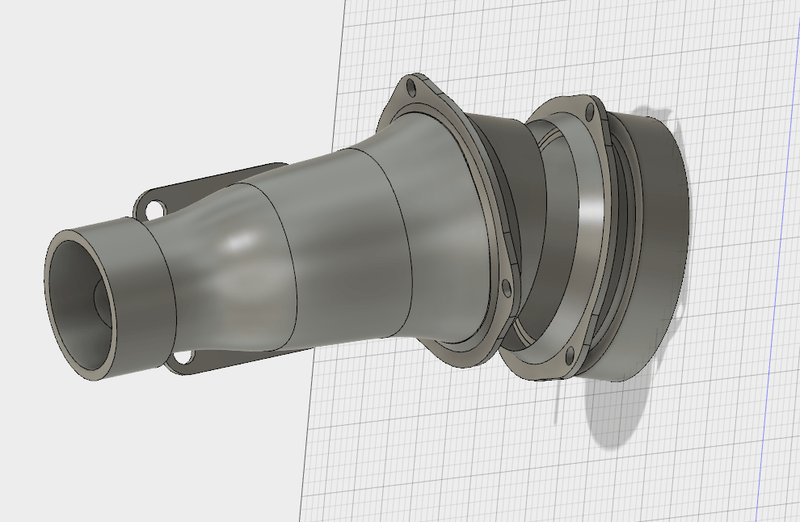
As mentioned above, the next part as you move towards the rear of the vehicle is the hot air valve which has been covered previously. After the hot air valves there is another rear ring that connects the hot air valves to the rear 90 degree pipe. These rings also have a support that reaches towards the side of the car to be used as another mounting point. Just like the coffee can, this rear ring has two files which have been mirrored to properly fit both sides of the vehicle. The two files to download and print for this part are: driver-rear-ring.stl and passenger-rear-ring.stl.


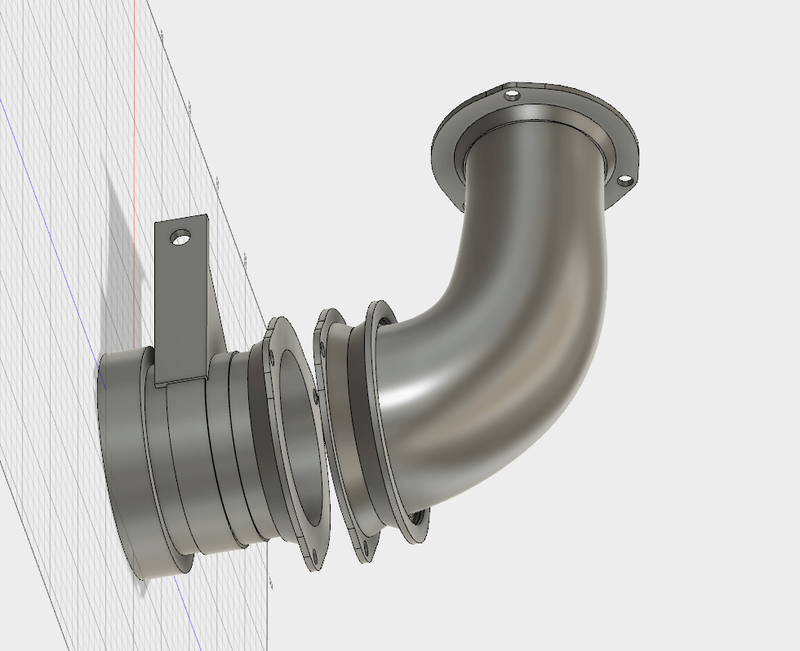
The finishing piece of the side mechanics connecting the hot air valves to the vehicle is the rear 90 degree pipe which is connected to the rear ring via their matching flanges. These two flanges are bolted together connecting the two pieces and finalize the piping. Just like the coffee can and the rear ring, this 90 degree pipe also requires two files that are a mirror of one another to create the proper angles on both the driver and passenger side of the vehicle. These two files are named: driver-rear-90.stl and passenger-rear-90.stl.

Below the rear of the side mechanics is a second lower curved pipe that connects back to the body using an angled fixture. Again I think this was simply placed here to create a sense of balance with the pipes. I’ve created the end fixture that connects to the vehicle as well as a curved piece of pipe. This curved pipe slides into the fixture and also has a stub on the opposite end that fits perfectly inside of standard 1.5″ PVC piping.
This allows you to use the same 3D model for both sides of the vehicle and also adjust the length of the pipe simply by trimming a piece of 1.5″ PVC. I really don’t know how this pipe is connected behind the hot air valves, but in the worst case scenario you should be able to print out another end fixture to connect it back to the vehicle body. The two 3D files to download for these parts are: lower-pipe-curved.stl and lower-pipe-end.stl.


Hopefully all of these files will help those out there building Batmobile replicas achieve their goal of the “holy grail” of accurate looking side mechanics. For those of us who painstakingly struggle over the details, this is one of the areas that we look at first when checking out a replica. How close did the builder get to attaining the holy grail.
If everything comes together, and things are finished off nicely, the final result should look something like this… 🙂


Leave a reply to Ron Stilwell Cancel reply